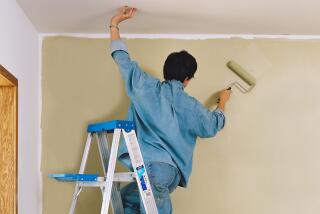
MAINTENANCE : Prepping Walls Ensures Quality Paint Job
Proper preparation does more to make a paint job come out right than any other factor--including the paint.
Blemishes you hardly notice on a dingy wall stand out under a neatly applied new coat of paint. Prepping walls and ceilings can take a lot of time and effort, but efficient planning makes the job easier and the results even better.
Begin by having everything you’ll need at hand before digging in. Helpful tools include a punch-type can opener, two-inch putty knife and/or pull scraper, four-inch taping knife, screwdrivers and a ladder.
Helpful supplies include joint compound or other filler compound, wood filler, 60- to 80-grit silicon carbide sandpaper and 120-grit abrasive, wall-washing detergent, pigmented shellac to seal water stains, plastic sandwich bags, masking tape, dropcloths, newspapers and paper and pencil to label any hardware you might remove.
Before filling a crack in a plaster wall, you must scrape out all of the loose bits and enlarge the crack with the pointed end of the can opener. Undercut the edges to help key the joint compound in place when it dries.
Clean the crevice, then moisten the prepared crack and work joint compound into the opening, filling it from top to bottom. Add a second layer of compound, if needed, after the first layer is dry, and sand out any rough spots with the 60- to 80-grit silicon carbide abrasive paper on a block. Feather the final layer of compound into the wall and sand it out later.
To patch a hole in plaster, first brush away any loose plaster. If the lath isn’t showing, moisten the hole and cover it with several quarter-inch thick coats of joint compound using a putty or taping knife. Let the compound dry, and sand between layers.
For larger holes where lath is showing, undercut the edges of the hole. Dampen the lath and plaster the edges with water. Use a four-inch taping knife to apply patching compound firmly into the hole. Make sure some squeezes through between the lath strips and some keys on the undercut edges of the hole. Fill the hole in front of the lath about a quarter-inch deep.
Score eighth-inch grooves in a crisscross pattern to ensure adhesion of the next coat. When the first coat is dry, moisten the area with water and apply a second layer of patching plaster feathered into the adjacent wall surface. Sand and smooth when dry.
Patching a hole in drywall where there is no lath or other backing to support the patch requires that you build a backing. For a doorknob-size hole, cut away the damaged area with a keyhole saw. Cut a piece of cardboard larger than the hole, yet small enough to fit through it diagonally.
Use a finishing nail to punch a hole in the cardboard’s center. Then pass a five-inch length of string knotted at one end through the cardboard. Apply glue to the front surface around the perimeter of the cardboard patch. Pass the patch through the hole and pull the string taut to pull the cardboard tight against the drywall while the adhesive sets. Then cut the string, moisten the edges and patch with joint compound and taping knife.
To fill a larger hole, cut a rectangular hole to expose enough of the studs on each side of the damaged area so you can nail in a matching drywall patch. Set it in place with plasterboard nails and make a slight dimple around the nailhead with the hammer. Fill the dimples and crevice around the patch with joint compound. Sand smooth when dry.
As a final check for wall smoothness, slip an old stocking over your hand and run it lightly across the sanded areas. Where the hose snags, sand again to remove roughness that will show through the paint.
Clean all surfaces with a vacuum for better paint adhesion. Wash ceilings with a powdered cleaning detergent, and wash the walls from the top down. Prime unpainted surfaces before applying two finishing coats for a super paint job.
